Table of Contents
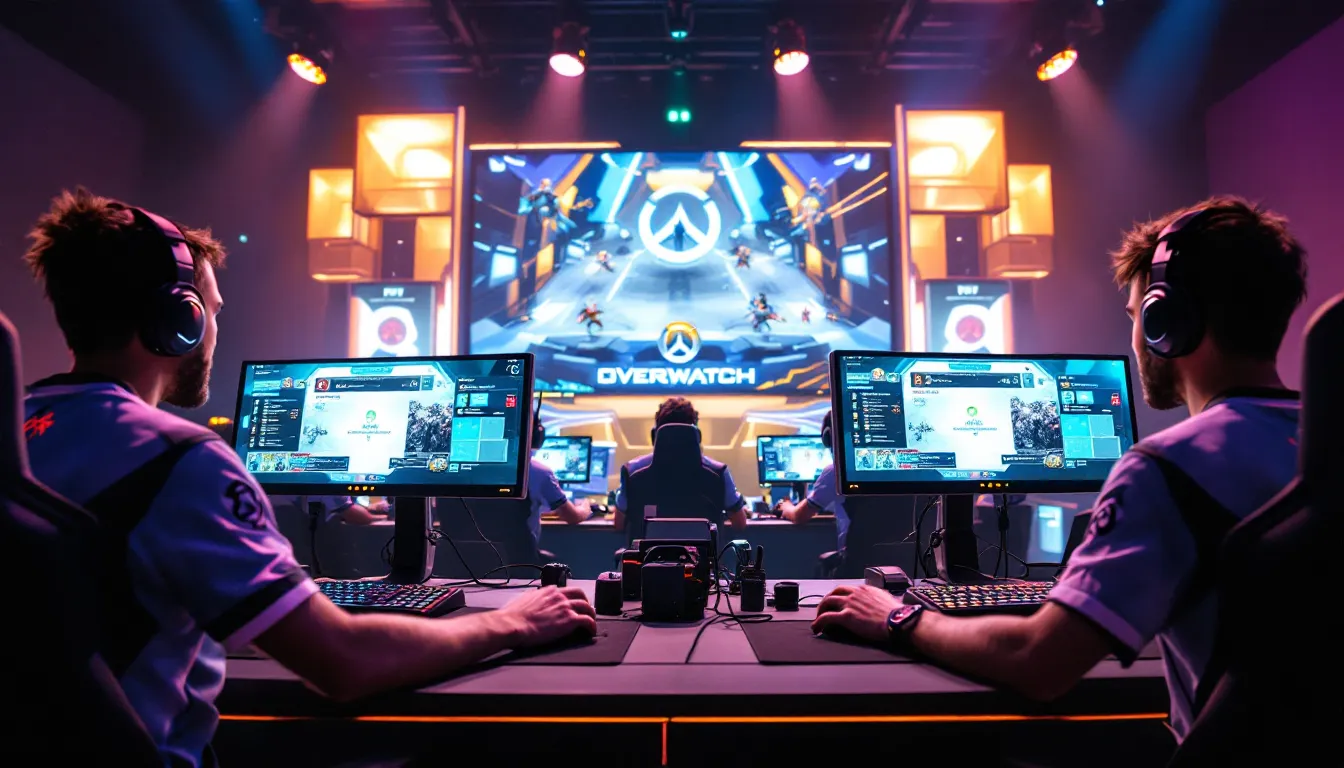
ToggleOverwatch 2’s shift to free-to-play has exploded the competitive scene, and whether you’re grinding through ranked or grinding ranked, positioning is what separates hardstuck players from SR climbers. JOI, a concept that’s become central to high-level Overwatch strategy, focuses on understanding where you should be and when you should be there. It’s not flashy, it won’t get play-of-the-game highlights, but mastering JOI fundamentals will transform how you impact fights. This guide breaks down what JOI actually means, why it matters in competitive play, and the exact positioning techniques pros use to dominate their games across all roles.
Key Takeaways
- JOI (Judgment of Impact) positioning is the critical foundation that separates hardstuck players from SR climbers, focusing on spatial awareness and decision-making rather than flashy mechanical outplay.
- Mastering high-ground advantage and maintaining optimal team spacing—distant enough to avoid area damage but close enough for support and coordination—wins teamfights before they begin.
- JOI positioning varies by role: tanks control space through active shield rotation, damage heroes find off-angles for safety, and supports position behind their team with clear rotation paths to counter dives.
- Reading enemy patterns and adapting your positioning mid-map based on the enemy composition (like playing at distance against Reaper and behind cover against Widow) is essential for advancing beyond 3800 SR.
- Consistent SR climbing requires drilling positioning fundamentals in solo queue and scrims until spacing and rotations become intuitive, combined with clear team communication and execution of agreed positioning strategies.
- Environmental shifts and ultimate economy timing directly impact optimal positioning—recognize when to reposition for new threats and position your team to enable coordinated ultimate combos.
What Is JOI In Overwatch?
Core Mechanics and Definition
JOI stands for Judgment of Impact, a framework that measures how effectively a player positions themselves to influence the outcome of engagements. Unlike raw mechanical skill or aim, JOI is about spatial awareness, decision-making under pressure, and reading the flow of a teamfight in real-time.
At its core, JOI positioning means you’re maximizing your effective range while maintaining sightlines to either engage enemies or peel for teammates. For a Widowmaker, that’s a high-ground vantage point where she controls a chokepoint. For a Mercy, it’s being close enough to heal without feeding enemy ults. For a Reinhardt, it’s positioning the shield where it blocks maximum incoming damage while still allowing your team to deal damage through it.
The metric itself is abstract, there’s no scoreboard stat for JOI, but the results are concrete. When positioning is tight, fights are won. When spacing breaks down, teammates die to preventable picks.
How JOI Differs From Traditional Gameplay
Traditional Overwatch guides often emphasize individual mechanical outplay: land headshots, build ultimate faster, secure kills. JOI flips that priority. It’s less about what you do in isolation and more about what position enables your team to do it better.
Consider a typical scenario: your team is attacking a chokepoint defended by an enemy shield. A player with strong mechanics might try to peek around the shield, land a lucky headshot, and secure a pick. A player with strong JOI might instead position at a secondary angle, forcing the enemy to spread their defense, creating space for your main tank to press forward. The outcome is the same, advantage gained, but the path is fundamentally different.
JOI also accounts for information asymmetry. You don’t know where enemies are at all times, so positioning isn’t just about the current moment, it’s about having options. If you’re predictably positioned, enemies can prefire, nade spam, or set traps. If you’re in a position that forces enemies to guess, or that gives you multiple escape routes, you’re maintaining agency. That’s JOI in practice.
Why JOI Matters for Competitive Play
Climbing SR in 2026 requires understanding that Overwatch is fundamentally a positioning game. The best aimers in the world still lose if they’re standing in bad spots because their team gets collapsed on, flanked, or caught out of position.
Pros in the Overwatch OverwatchLeague: The Future of Esports spend hours analyzing film not to admire flashy kills, but to study where players are standing in relation to their team, the map geometry, and enemy sightlines. That obsessive attention to positioning is what wins maps.
At high SR (3800+), the difference between winning and losing a fight often isn’t mechanical, it’s whether your team was in a position to use their ultimates together, whether your supports were safe, whether your backline had an escape route. A single player standing 5 meters out of position can cascade into a lost teamfight, then a lost map push, then a lost game.
JOI matters because it democratizes skill expression. You don’t need the fastest reflexes to position well: you need map knowledge, game sense, and the discipline to hold a disciplined line. This makes competitive climbing more accessible while still maintaining a high skill ceiling. Even if your aim is 75th percentile, your positioning can be 95th percentile, and that gap is what wins games.
Positioning and Map Control Fundamentals
High-Ground Advantage and Angles
High ground is the foundation of Overwatch positioning. It grants several mechanical advantages: enemies looking up have reduced peripheral vision, projectiles travel slower upward (making them easier to track), and you can see over cover that shields enemies from your teammates.
But high-ground positioning isn’t just about standing on a box. It’s about understanding when to hold it and when to abandon it. On a map like Route 66 first point, the high ground on the left side is valuable during poke phase when both teams are fishing for picks. But if the enemy plays a dive composition with D.Va and Winston, holding that high ground means you’re isolated and easy to collapse on.
Angles compound the value of high ground. The best positioning puts you where enemies have multiple angles to peek to find you, which forces them to spread attention or commit resources to clearing you. A Tracer standing in the enemy’s sightline is dead. A Tracer standing where the enemy has to check three different angles to confirm whether she’s there? That’s pressure without risk.
High-ground also enables peel rotations. If your supports are caught in a dive, a damage hero on high ground can reposition and counter-dive the enemy flankers before they secure kills. Without high-ground positioning, your supports are caught in a 2v1 and you’re already lost.
Team Coordination and Spacing
Individual JOI positioning is only half the battle. Team spacing, the distance and sightline relationship between teammates, determines whether a teamfight is winnable.
Consider the difference between clustered spacing and spread spacing. If your team is stacked at 5-meter radius, a Tracer pulse bomb eliminates three of you. A Pharah rocket dares in and clears half your team. Now consider spacing where your main tank is 15 meters forward, your off-tank is 5 meters back, damage dealers are spread across two different sightlines, and supports are 20+ meters back: a pulse bomb hits one person, a rocket forces someone to use abilities to dodge.
The rule of thumb is distance without isolation. You want enough spacing that area damage isn’t a team wipe, but not so much spacing that individual players are out of support range or isolated to be picked one-by-one. A Mercy healing at 40 meters can’t reach a Tracer getting dove by D.Va. A Mercy at 10 meters is too close and feeding the dive. 25 meters? That’s the range sweet spot where she has sightline and can rotate if needed.
Team coordination enforces spacing through comms. When a player says “collapsing,” the team tightens range by 5 meters. When someone says “spread,” players laterally disperse without moving forward. The best teams have an intuitive sense of their spacing and adjust it mid-fight based on enemy positioning. This is what separates 4200+ teams from 3800 teams, pure spacing discipline.
Essential JOI Techniques for Each Role
Tank Positioning and Engagements
Tank positioning sets the tone for the entire fight. Your role as a tank is to control space, not necessarily to kill enemies, though that helps.
Main Tank (Reinhardt, Sigma, Orisa) positioning is about shield placement and forward progress. A Reinhardt holding shield passively at chokepoint loses pressure wars because the enemy shield is just as large. Effective Rein positioning uses cover, advances incrementally, and rotates shield angles to force enemies out of position. When enemies are grouped behind their shield, you position to threaten their supports or force them to spread. This is active positioning, reading where enemies want to be and standing somewhere that makes that uncomfortable.
Off-Tank (Junker Queen, D.Va, Zarya) positioning is about creating chaos on enemy backline while staying connected to your team. A D.Va that flies to enemy backline and immediately dies is bad. A D.Va that flies to enemy backline, kills their Mercy, and has a retreat route? That’s excellent JOI. The best off-tank positioning creates asymmetrical threat, enemies can’t cover all threats simultaneously. If enemy main tank is covering their supports, your off-tank flanks. If enemies split to peel, your main tank presses forward.
Engage timing matters as much as position. Tanks that engage without their team (frontline advantage) feed ultimate charge. Tanks that wait for teammates to group first (but engage as soon as 5 allies are ready) convert teamfight wins into kills and space.
Damage Hero Flanking and Optimal Sightlines
Damage heroes thrive on finding angles that create 1v1 opportunities or catch enemies rotating. The best damage positioning is offensive without being reckless.
A Tracer that flanks deep, gets one kill, and dies to follow-up is even trade SR at best. A Tracer that flanks to a position where she can get one pick, threaten backline for 3 seconds, then blink out? She’s forcing the enemy to dedicate someone to defend backline, which weakens the front engagement.
Sightline optimization means positioning where you have shots available but enemies don’t have easy return fire. A Widowmaker perched on an edge where she can scope in and out of cover is stronger than standing in open playing peek-a-boo. A Hitscan hero positioned where they can strafe while maintaining sightlines is harder to duel than someone standing still.
The common mistake is positioning for kills instead of positioning for safety. You don’t need to be closest to the enemy to secure picks, you need to be positioned so that when you secure a pick, you can escape retribution. This is why experienced damage mains play off-angles: they’re further from the fight than it seems necessary, but they have cover and escape routes, turning 1v2 scenarios into situations where they secure a pick and leave before enemies collapse.
Support Placement and Safety Awareness
Support positioning is the most defensive role, but also the most consequence-heavy. If your DPS dies, they respawn in 12 seconds. If your supports die, your team loses healing and usually loses the fight within the next 5 seconds.
Mercy positioning is a dance between LoS to teammates and distance from threats. Optimal Mercy position is behind her team, roughly 20-25 meters back, with sightline to both primary and secondary heal targets. This range lets her heal the frontline while maintaining distance from divers. When a dive happens, she immediately rotates to a side exit, boosting/healing whoever’s being dove, then repositioning once the dive is over.
Ana positioning is further back, in corners or high ground where she can scope safely. A mistake most Ana players make is standing too far back (where she can’t see threats rotating toward her) or too far forward (where she’s vulnerable to duels). Optimal Ana positioning is where she sees the fight, can land sleeps, and has a rotation path to high ground or cover if enemies push.
Lúcio and Zenyatta position differently. Lúcio needs to be mobile and in range of teammates (12-15 meter radius), so he positions mid-backline with escape routes. Zenyatta needs high ground or protected position where he can discord and poke, but he’s slow, so his positioning is more static.
All supports share a critical rule: never position where you’re the easiest target in a teamfight. If enemies see your Mercy and have a free dive target, you’re positioned wrong. You should be the hardest to reach, requiring enemies to either commit multiple resources or break their team’s positioning to threaten you.
Advanced JOI Strategies for Competitive Climbing
Reading Enemy Patterns and Adapting
Once you’ve internalized basic positioning, winning at higher SR requires reading what enemies plan to do and positioning to counter it before it happens.
Every team has patterns. Some main tanks always shield-advance predictably. Some off-tanks always flank from the same route. Some supports always gravitate toward the same side. The best players exploit these patterns by pre-positioning. If you know the enemy D.Va always dives your Mercy from the left side, you position Mercy so she can escape left, or you position a support peeler (like a Brigitte) on the left side to shut the dive down.
Pattern recognition also applies to ultimate economy. If enemies have Tracer ultimate and haven’t used it for 30 seconds, they’re setting up a coordinated pulse bomb + dive. Positioning preemptively means staggering your team’s spacing so the pulse bomb doesn’t catch multiple people, or standing near cover so you can react fast enough.
Adaptation within a game is where true JOI mastery shows. Your positioning against a Reaper-heavy comp is different from positioning against a Widow-heavy comp. Against Reaper, you position at distance and spread so he can’t get close. Against Widow, you position behind cover, move unpredictably, and use off-angles so she can’t set up easy shots. The best climbers adjust their positioning mid-map based on what enemies are running.
Ultimate Economy and Timing JOI Moments
Ultimate economy is the hidden metric that determines who wins fights. A team with ultimates wins. A team without wins by position and mechanics. The best players time their JOI positioning to amplify their ultimate advantage.
Consider Grav + Earthquake combo. The positioning that sets this up is spacing where Zarya gets charged behind her team, then walking forward incrementally so when grav is ready, the team is in range to combo immediately. A team that’s too spread out can’t follow up. A team that’s clustered feeds poke damage. The exact positioning that makes grav + earthquake unstoppable is slightly spread, but close enough that both ultimates hit multiple targets.
Timing JOI moments means positioning to enable ultimates when they’re ready. If your Genji blade is ready, positioning should threaten the enemy backline so they waste resources rotating to peel for Genji, then committing blade when their backline is disorganized. If your Nano-boosted Reaper is about to engage, positioning the rest of your team so Reaper has cover and escape routes.
The meta shift toward ultimate denial and spawn camping has also changed JOI timing. Now, positioning includes thinking about where the enemy will spawn from and whether your positioning can threaten their spawn exits. This is why high-level teams position aggressively after teamfight wins, to secure high-ground in enemy spawn area, forcing them to take alternate routes and staggering their response.
Common JOI Mistakes and How to Avoid Them
Overextending and Losing Team Fights
The most common JOI mistake is overextending, positioning so far forward that you’re isolated from team peel or healing. This usually happens when a player gets a pick and immediately overcommits, pushing further to secure a second kill, then getting collapsed on.
The mental shift required is thinking about positioning as range management, not forward progress. You’re not trying to be closest to enemies: you’re trying to be in a position that’s optimal for your role. A Widowmaker who’s advanced 5 meters closer isn’t 5% more useful, she might be 50% more vulnerable to flanks with no advantage in sightline.
The solution is position discipline: decide your positioning pre-fight, commit to it unless the situation changes (they’re running a flanker, your team is getting poked out), and don’t drift forward incrementally. Many losses happen because one player slowly walks up 10 meters during a poke phase, breaks the team’s spacing, gets picked, and suddenly it’s a 5v5 with a numbers advantage.
Team positioning breakdowns also happen when players don’t recognize when a position is no longer tenable. If the enemy has High Noon ready and your team is still standing in wide-open space, recognizing “we need to play behind cover now” is an advanced JOI skill. The difference between 3800 and 4000 SR teams is often just that, recognizing when environmental positioning changes force a repositioning.
Poor Communication and Execution Breakdowns
Positioning only works if everyone is executing the same plan. A common scenario: your tank is positioning for a forward engage, but your supports are positioning defensively, and your DPS is repositioning for the enemy flanker. Three different positioning strategies in one fight = chaos and losses.
Communication needs to be simple and actionable. “Play high ground,” “get close,” “spread out,” “behind the pillar”, these are clear positioning instructions. Vague comms like “good positioning” or “play around the corner” don’t help because teammates interpret them differently.
Execution breakdowns happen when teams understand the positioning but don’t commit to it. A tank communicates they’re engaging, but the team doesn’t push with them. Or the team decides to play back, but the tank engages anyway. One-off executions (one player going off-plan) lose fights. The phrase “trust the call, execute the call” is annoying but true, if your team commits to a positioning strategy, committing fully is better than half-committing.
The best teams have positioning “plays” that are drilled. “When I say collapse, everyone moves 5 meters toward main,” etc. Drilling removes the interpretation gap and lets teams execute positioning faster.
Practicing JOI: Drills and Training Methods
Solo Queue Drills for Consistency
Improving JOI in solo queue requires focused practice. Don’t just grind ranked hoping positioning improves, practice specific scenarios.
The High-Ground Drill: Pick your role and a map. For five minutes, focus only on being in optimal high-ground position relative to your team and enemies. Don’t worry about kills or healing output, just positioning. Notice patterns: where are enemies positioned that you have sightline? What cover enables escape? This develops position-reading intuition.
The Spacing Drill: Play a round focusing only on maintaining team spacing. Are you grouped? Spread out 2 meters. Are you isolated? Move closer. Maintain a mental model of where teammates are at all times. This sounds simple, but most players don’t actively monitor spacing.
The Rotation Drill: Practice moving between positions without losing sightlines or getting picked. The goal is smooth rotations. Can you move 15 meters back without turning your back to enemies? Can you reposition from one angle to another without being caught in transition? Efficient rotations are underrated but critical.
Watch replays focusing on positioning, not kills. Pause at teamfights and ask: “Where was I? Where should I have been? What did positioning enable or prevent?” This metacognitive approach builds positioning sense faster than grinding ranked.
Team Practice and Scrim Scenarios
Team practice is where JOI becomes truly actionable because you’re coordinating actual spacing and executing positioning plays against opponents who adapt.
Positioning Drills in Scrims: Run scrims where you focus on one positioning principle, say, maintaining 15-meter spacing, or holding high-ground. Ban certain map angles or chokes so teams are forced to execute positioning correctly. Give teams detailed positioning callouts mid-fight.
Role-Specific Scenarios: Practice specific situations. Set up a 5v5 at a choke point. Tank communicates they’re advancing. Can the team maintain spacing and follow the advance? Set up a 1v1 scenario where a flanker is threatening backline. Does the support have a rotation planned? These scenarios teach positioning under pressure.
A resource like ProSettings can show how pro players configure their setups, but positioning drills require custom games or scrim time. The mentality shift is understanding that positioning isn’t something you learn theoretically, it’s something you internalize through repetition.
Reviewing Overwatch Beginner Tips: Dominate the Game and fundamentals is useful, but climbing further requires advanced positioning focus. The meta is constantly shifting (Overwatch Game Reviews: Discover Gameplay Secrets covers current meta positioning), so staying sharp means regularly reviewing current patch changes and how they affect positioning, a buff to a hero’s mobility, for instance, changes optimal spacing against that hero.
Game8 and other resources often have tier lists and meta analysis that can inform positioning strategy against popular compositions, though positioning principles remain universal: distance without isolation, sightlines without vulnerability, and spacing that lets your team execute coordinated plays.
Conclusion
JOI mastery isn’t flashy, but it’s the foundation separating hardstuck players from consistent climbers. The players winning 4200+ games aren’t necessarily the ones with the best reflexes, they’re the ones positioning with such discipline that fights are won before the shooting starts.
Start with fundamentals: understand high-ground advantages, maintain team spacing, and position for your role’s needs. Then layer in adaptability, read enemy patterns, time your ultimates around positioning, and recognize when environmental shifts demand repositioning. Finally, drill positioning relentlessly, both in solo queue and team scrims, until it becomes intuitive.
The path to SR climbing isn’t learning the flashiest mechanics. It’s the unglamorous work of standing in the right spot at the right time, with the right team composition, communicating clearly. That’s where games are won, and that’s where your focus should be. From there, mechanical skill and gamesense polish the edges, but JOI positioning builds the foundation.